
iPhone and Mac are both Apple, so you have neat built-in options like AirDrop. But if you want the photos themselves, ready to paste, there is something faster. Here are the best ways, none of which need iCloud.
The quick answer: a direct clipboard transfer is the fastest way to get iPhone photos onto a Mac. Camera to Clipboard puts the photo straight into your Mac's clipboard, so you paste it with Cmd + V. It sends a batch as happily as one shot. AirDrop and a cable are below.
Free for iPhone Free for Mac Free for Android Free for Windows
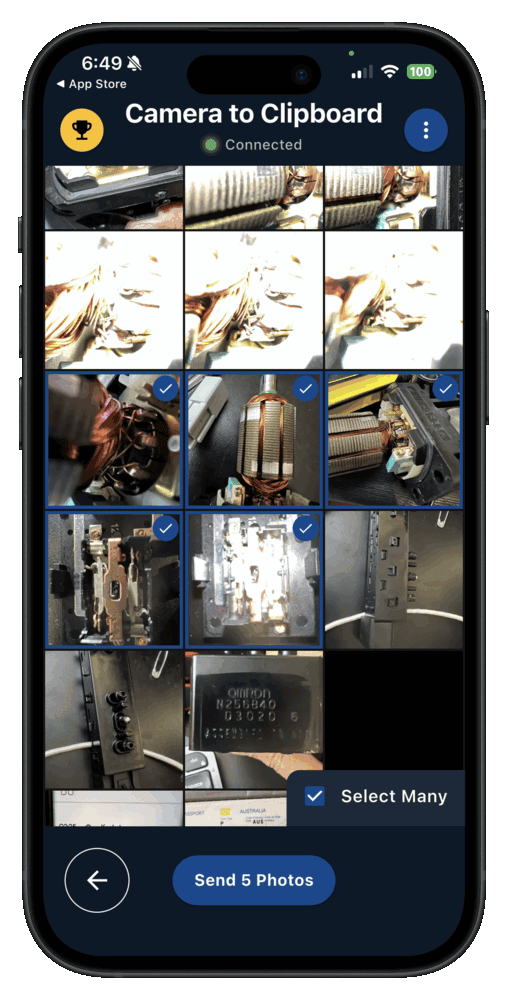
Camera to Clipboard puts an iPhone photo on the Mac clipboard
The whole trip is one tap on the iPhone and one keystroke on the Mac.
- A photo taken or picked on the iPhone lands on the Mac clipboard, ready for Cmd + V. Paste it into Mail, Messages, Pages, Keynote or Photoshop with no file to save and no import step.
- An iPhone photo sent with Camera to Clipboard crosses your own Wi-Fi and never touches iCloud. Nothing is uploaded to a server. None of your iCloud storage is used, and a full account cannot block the transfer.
- Sending an iPhone photo to the Mac works over a phone hotspot as well as home Wi-Fi. The two apps use the internet only to find each other. The photo stays on the network the iPhone and the Mac share.
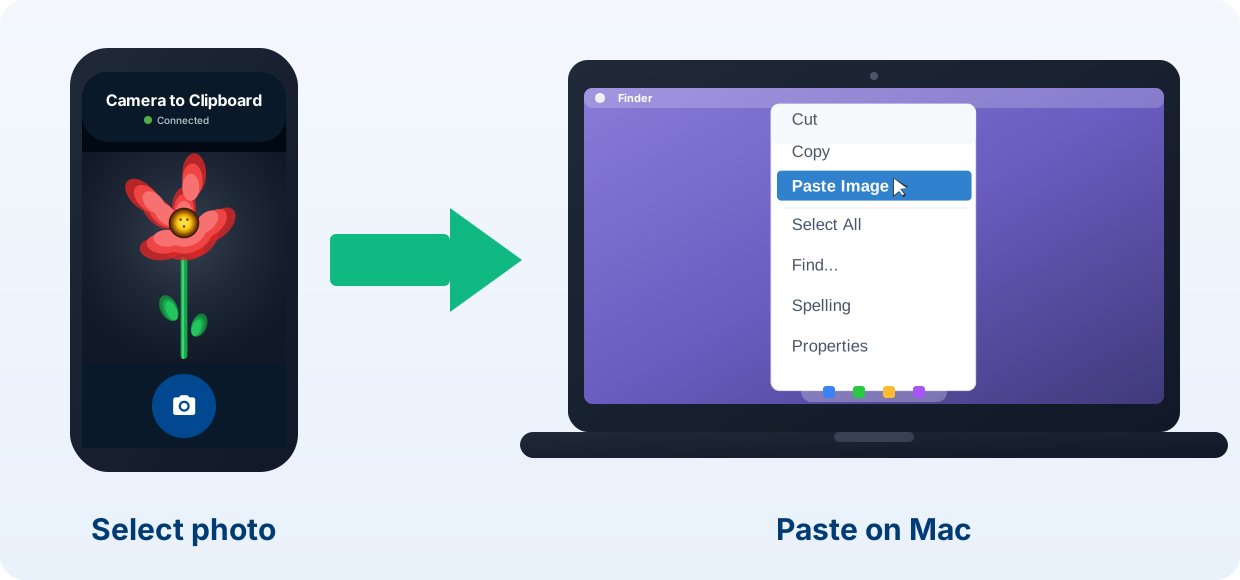
Pair Camera to Clipboard once to paste iPhone photos on the Mac
Four steps take you from a fresh install to a photo on the Mac clipboard.
- Install Camera to Clipboard on your iPhone and the desktop app on your Mac.
- Pair them once by scanning a QR code.
- On the iPhone, take a photo or pick one from your library.
- Press Cmd + V on your Mac to paste. Done.
Free to download and try on both the iPhone and Mac. The free version adds a small watermark and caps photos at 1920px. Pro removes both.

Use AirDrop to send iPhone photos to a Mac without iCloud
AirDrop is Apple's own wireless transfer and it is already on both devices.
- AirDrop sends an iPhone photo to a Mac from the iPhone's Share sheet. Open the photo, tap Share, choose AirDrop, then pick your Mac.
- A photo sent by AirDrop arrives in the Mac's Downloads folder as a file. Opening it and copying the image out is a separate job if you want to paste it somewhere.
- AirDrop needs Bluetooth and Wi-Fi switched on at both the iPhone and the Mac. Apple also asks for the two devices to be within 30 feet, about 10 metres, of each other.

Import a whole iPhone camera roll with a cable and the Photos app
A cable is the built-in way to pull everything off the iPhone at once.
- Connect the iPhone to the Mac with a cable, unlock it and tap Trust. The Mac cannot see the camera roll until the iPhone has trusted that computer.
- The Mac Photos app lists a connected iPhone in its sidebar. Click the iPhone there, then click Import Selected or Import All New Photos.
- A cable and the Photos app are the quickest way to move thousands of iPhone photos. Everything that crosses is filed into the Mac photo library as the import runs.

Copy iPhone photos into any Mac folder with Image Capture
Image Capture is the Mac app for the files themselves rather than a library entry.
- Image Capture is Apple's own Mac app for pulling photos off a connected iPhone. It copies them as plain files and leaves the Mac photo library untouched.
- Image Capture lets you pick the exact folder the iPhone photos are copied into. That is what makes it the one to reach for when the files have to land somewhere specific.

Camera to Clipboard skips the Downloads folder AirDrop uses
AirDrop is good at moving files, and moving files is where it stops.
- An iPhone photo sent with Camera to Clipboard arrives on the Mac clipboard, ready to paste. It is never left sitting in Downloads for you to find, open and copy first.
- Camera to Clipboard sends iPhone photos to a Windows PC and to Android phones as well as to a Mac. AirDrop can do none of that, because it only ever talks to other Apple devices.
- iPhone photos sent with Camera to Clipboard arrive on the Mac at full resolution. On Pro the Mac gets the same pixels the iPhone camera saved, with no compression step in between.

AirDrop hands you a file and Camera to Clipboard hands you a paste
Here is how the two compare on the points that decide which one you open.
| What you want to do | Camera to Clipboard | AirDrop |
|---|---|---|
| Get an iPhone photo onto a Mac | ✔ | ✔ |
| Photo lands ready to paste | ✔ | Saves a file to Downloads |
| No file to find and open | ✔ | Opens from Downloads |
| Also works with a Windows PC | ✔ | Apple devices only |
| Also works with Android phones | ✔ | Apple devices only |
| Works over a phone hotspot | ✔ | Needs Bluetooth and devices close by |
| Full resolution, no compression | ✔ on Pro | ✔ |
| Free to download and try | ✔ | ✔ |

Paste with Camera to Clipboard, save files with AirDrop or a cable
Every method here gets the photos across, so pick by how many you are moving.
- Camera to Clipboard is the best way to get an iPhone photo onto a Mac when you want to paste it right now. One photo or a whole selection, and every one of them arrives on the clipboard rather than on disk.
- AirDrop is the best way to send a handful of iPhone photos to a Mac as files. They land in the Mac's Downloads folder, and opening or copying them afterwards is your job.
- A USB cable and the Mac Photos app are the best way to import an entire iPhone camera roll. Thousands of photos move in one go, and each is filed into the Mac photo library as it lands.
Common questions
How do I transfer photos from iPhone to Mac without iCloud?
Use AirDrop, a USB cable with the Photos app, or Camera to Clipboard, which drops the photo into your Mac's clipboard. None require iCloud.
What is the fastest way to get one photo from iPhone to Mac?
A direct clipboard transfer. Camera to Clipboard places the photo straight into your Mac's clipboard so you paste it with Cmd+V immediately.
How is this different from AirDrop?
AirDrop saves a file to Downloads that you then open and copy. Camera to Clipboard puts the image straight on your clipboard.